HTML5テクニカルノート
Angular 5入門 03: データのリストを表示する
- ID: FN1801002
- Technique: HTML5 / JavaScript
- Package: Angular 5.2.0
本稿は、複数のデータをテンプレートにもとづいてリスト表示し、マウスクリックでリスト項目が選べるようにします。「Angular 5入門 02: 編集ページをつくる」で書いたコードに手を加えてゆきましょう。
Angular Version 6については「Angular 6入門 03: データのリストを表示する」をお読みください。
01 データのモジュールを定める
複数データは新たなモジュール(TypeScriptファイル)に、配列でconst宣言した定数に納めます。アプリケーションのフォルダ(src/app)にTSファイル(mock-heroines.ts)を定めて、つぎのコード001のように定数(HEROINES)をexportします(「TypeScript: 基本型」03「const宣言」参照)。配列要素のデータ型は項目のオブジェクト用として定義しておいたクラス(Heroine)です(「TypeScript: 基本型」04「配列」参照)。
コード001■新たなモジュールの定数にデータを定める
src/app/mock-heroines.ts
import {Heroine} from './heroine';
export const HEROINES: Heroine[] = [
	{id: 11, name: 'シータ'},
	{id: 12, name: 'ナウシカ'},
	{id: 13, name: 'キキ'},
	{id: 14, name: '千尋'},
	{id: 15, name: 'さつき'},
	{id: 16, name: 'ソフィー'},
	{id: 17, name: 'マーニー'},
	{id: 18, name: '菜穂子'},
	{id: 19, name: 'サン'},
	{id: 20, name: 'フィオ'}
];
子コンポーネント(heroines.component)のTypeScriptファイルは、クラス(HeroinesComponent)から項目ひとつのプロパティ(heroine)は除いて、新たに加える複数データのプロパティ(heroines)に前掲モジュールの定数(HEROINES)を定めます。
src/app/heroines/heroines.component.tsimport {HEROINES} from '../mock-heroines'; export class HeroinesComponent implements OnInit { /* heroine: Heroine = { id: 1, name: 'シータ' }; */ heroines = HEROINES; } }
項目ひとつのプロパティ(heroine)がなくなってしまったので、子コンポーネント(heroines.component)のテンプレートは、ひとまず複数データのプロパティ(heroines)の最初の配列要素を項目データとして扱うことにします。これで、アプリケーションの動きはもとと変わらず、ページにははじめのデータが表示されるはずです。
src/app/heroines/heroines.component.html<!--<h2>{{heroine.name}}の情報</h2>--> <h2>{{heroines[0].name}}の情報</h2> <!--<div><span>番号: </span>{{heroine.id}}</div>--> <div><span>番号: </span>{{heroines[0].id}}</div> <div> <label>名前: <!--<input [(ngModel)]="heroine.name" placeholder="名前">--> <input [(ngModel)]="heroines[0].name" placeholder="名前"> </label> </div>
02 複数データをリスト表示する
複数データのリストをアプリケーションのページに加えましょう。手直しするのは、データを表示する子コンポーネント(heroines.component)のテンプレートです。つぎのように、<li>要素にngForディレクティブを定めます(「NgForOf」参照)。このディレクティブは、リストのオブジェクト(heroines)からデータをひとつひとつ変数(let)に取り出し、ディレクティブが与えられた要素(<li>)をテンプレートにして差し込むのです。つまり、データがすべてリストとしてアプリケーションのページに加わることになります。なお、ディレクティブの前に添えたアスタリスク(*)は、その要素がテンプレートになることを示します(「The asterisk (*) prefix」)。
src/app/heroines/heroines.component.html<ul class="heroines"> <li *ngFor="let heroine of heroines"> <span class="badge">{{heroine.id}}</span> {{heroine.name}} </li> </ul>
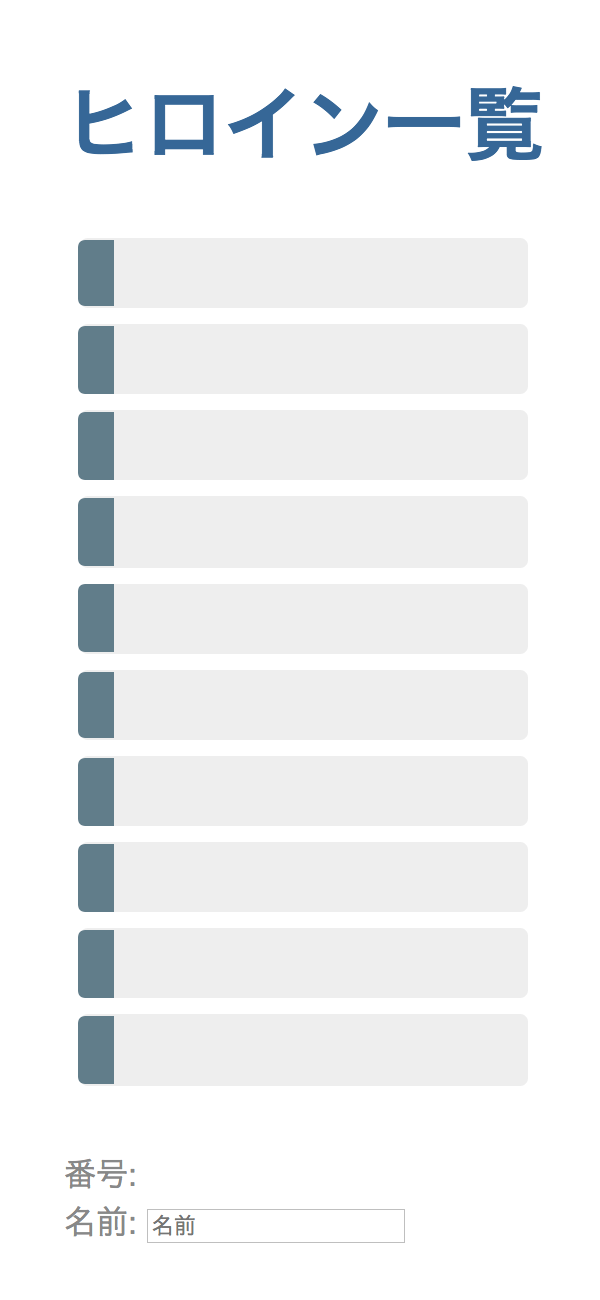
データを表示するコンポーネント(heroines.component)に、さらに以下のコード001でCSSスタイルを定めます。これで、複数データがアプリケーションのページにリスト表示されて、スタイルも与えられました(図001)。
図001■ページに表示されるデータにスタイルが与えられた

コード002■データを表示するコンポーネントのCSSスタイル
src/app/heroines/heroines.component.css
.selected {
	background-color: #CFD8DC !important;
	color: white;
}
.heroines {
	margin: 0 0 2em 0;
	list-style-type: none;
	padding: 0;
	width: 15em;
}
.heroines li {
	cursor: pointer;
	position: relative;
	left: 0;
	background-color: #EEE;
	margin: .5em;
	padding: .3em 0;
	height: 1.6em;
	border-radius: 4px;
}
.heroines li.selected:hover {
	background-color: #BBD8DC !important;
	color: white;
}
.heroines li:hover {
	color: #607D8B;
	background-color: #DDD;
	left: .1em;
}
.heroines .text {
	position: relative;
	top: -3px;
}
.heroines .badge {
	display: inline-block;
	font-size: small;
	color: white;
	padding: 0.8em 0.7em 0 0.7em;
	background-color: #607D8B;
	line-height: 1em;
	position: relative;
	left: -1px;
	top: -4px;
	height: 1.8em;
	margin-right: .8em;
	border-radius: 4px 0 0 4px;
}
03 リストからクリックした項目のデータを編集する
リストをクリックしたら、その項目が編集できるようにしましょう。そのために、データ表示のコンポーネント(heroines.component)のテンプレートで、つぎのようにリストの要素(<li>)に丸かっこ()でクリックイベント(click)をバインディングします(「Event binding ( (event) )」)。値の文字列は、呼び出すクラスのメソッド(onSelect())です。引数には、クリックした要素のオブジェクト(heroine)を渡しました。
src/app/heroines/heroines.component.html<ul class="heroines"> <li *ngFor="let heroine of heroines" (click)="onSelect(heroine)"><!-- 追加 --> </li> </ul>
コンポーネント(heroines.component)のクラス(HeroinesComponent)に以下のようにメソッド(onSelect())を定めると、リストの項目をクリックしたとき呼び出され、その項目のオブジェクトが引数(heroine)に渡されて、クラスのプロパティ(selectedHeroine)に与えられます。console.log()メソッドを加えましたので、クリックした項目のデータはたとえばつぎのようにブラウザのコンソールで確かめられるはずです。
{id: 11, name: "シータ"}
src/app/heroines/heroines.component.tsexport class HeroinesComponent implements OnInit { selectedHeroine: Heroine; onSelect(heroine: Heroine): void { this.selectedHeroine = heroine; console.log(heroine); // 確認用 } }
クリックした項目のオブジェクトはデータ表示のコンポーネント(heroines.component)のプロパティ(selectedHeroine)に与えられましたので、テンプレートでつぎのようにデータを編集する要素にバインディングすれば値が書き替えられるはずです。
src/app/heroines/heroines.component.html<!--<h2>{{heroines[0].name}}の情報</h2>--> <h2>{{selectedHeroine.name}}の情報</h2> <!--<div><span>番号: </span>{{heroines[0].id}}</div>--> <div><span>番号: </span>{{selectedHeroine.id}}</div> <div> <label>名前: <!--<input [(ngModel)]="heroines[0].name" placeholder="名前">--> <input [(ngModel)]="selectedHeroine.name" placeholder="名前"> </label> </div>
ところが、アプリケーションをブラウザで開くと、項目がリスト表示されず、コンソールにはつぎのようなエラーが示されます(図002)。もっとも、テキストが表示されていないリスト項目のどれかをクリックすれば、アプリケーションは動き始めるのです。
ERROR TypeError: Cannot read property 'name' of undefined
図002■アプリケーションをブラウザで開くと項目がリスト表示されない
このエラーは、リストの項目をクリックしないと、プロパティ(selectedHeroine)の値が空で、リストの下の編集項目に番号と名前が表示できないからです。したがって、たとえばつぎのように初期値を与えれば、エラーが避けられます。
src/app/heroines/heroines.component.tsexport class HeroinesComponent implements OnInit { selectedHeroine: Heroine = HEROINES[0]; // リストの最初の項目が初期値になる }
けれど、予め選択を決めたくない場合もあります。今回は、リスト項目をクリックしてから編集項目のデータが示されるようにします。そのときに使うのが、ngIfディレクティブです(NgIfディレクティブ)。値に定めた文字列の条件がtrueと評価されなければ、ディレクティブを定めた要素のノードはつくられません。そこで、つぎのようにngIfディレクティブが加えられた要素(<div>)で編集項目を包みます(ディレクティブに添えたアスタリスク*はその要素がテンプレートになることを示します)。これで、はじめリストの下には何もなく、リスト項目をクリックするとデータが示されます。
src/app/heroines/heroines.component.html<div *ngIf="selectedHeroine"><!-- 追加 --> <h2>{{selectedHeroine.name}}の情報</h2> </div>
04 クリックした項目のスタイルを変える
前掲コード002のCSSには、選択したリスト項目のスタイルもクラス(selected)として定められています。けれど、まだ適用されていません。条件に応じて要素にクラスを与えるのが「クラスバィンディング」です(「Class binding」)。つぎの構文で、加えるクラスと条件を定めます。
<要素 [class.クラス名]="条件">
データ表示のコンポーネント(heroines.component)のテンプレートには以下のように書き加え、選択項目のプロパティ(selectedHeroine)にオブジェクト(heroine)が一致する項目のスタイル(selected)をクラスバィンディングします。これで、クリックして選んだリスト項目のスタイルが変わります(図003)。
図003■クリックしたリスト項目のスタイルが変わる

src/app/heroines/heroines.component.html<li *ngFor="let heroine of heroines" [class.selected]="heroine === selectedHeroine" (click)="onSelect(heroine)"> <span class="badge">{{heroine.id}}</span> {{heroine.name}} </li>
手直ししたデータ表示のコンポーネント(heroines.component)のTypeScriptコードとテンプレートは、つぎのコード003にまとめました。併せて、Plunkerに「Angular 5 Example - Tour of Heroines 03」としてアップロードしましたので、ファイルごとのコードの中身はこちらでお確かめください。
コード003■データ表示のコンポーネントのTypeScriptコードとテンプレート
src/app/heroines/heroines.component.ts
import {Component, OnInit} from '@angular/core';
import {Heroine} from '../heroine';
import {HEROINES} from '../mock-heroines';
@Component({
selector: 'app-heroines',
templateUrl: './heroines.component.html',
styleUrls: ['./heroines.component.css']
})
export class HeroinesComponent implements OnInit {
heroines = HEROINES;
selectedHeroine: Heroine;
constructor() {}
ngOnInit(): void {
}
onSelect(heroine: Heroine): void {
this.selectedHeroine = heroine;
}
}
<ul class="heroines">
<li *ngFor="let heroine of heroines"
	[class.selected]="heroine === selectedHeroine"
	(click)="onSelect(heroine)">
	<span class="badge">{{heroine.id}}</span> {{heroine.name}}
</li>
</ul>
<div *ngIf="selectedHeroine">
<h2>{{selectedHeroine.name}}の情報</h2>
<div><span>番号: </span>{{selectedHeroine.id}}</div>
<div>
<label>名前:
<input [(ngModel)]="selectedHeroine.name" placeholder="名前">
</label>
</div>
</div>
- Angular 5: Angular CLIで手早くアプリケーションをつくる
- Angular 5入門 01: アプリケーションの枠組みをつくる
- Angular 5入門 02: 編集ページをつくる
- Angular 5入門 04: 詳細情報のコンポーネントを分ける
- Angular 5入門 05: データをサービスにより提供する
- Angular 5入門 06: ルーティングで画面を切り替える
- Angular 5入門 07: ルーティングで個別情報を示す
- Angular 5入門 08: HTTPサービスでリモートのデータを取り出して書き替える
- Angular 5入門 09: HTTPサービスでリモートのデータを加えたり除いたりする
- Angular 5入門 10: HTTPサービスでリモートのデータを検索する
作成者: 野中文雄
作成日: 2018年1月16日
Copyright © 2001-2018 Fumio Nonaka. All rights reserved.